A few weeks ago, an analysis explored the cameras instrumental in bringing this year’s Oscar-nominated films to life. While that examination offered valuable insight into the technological backbone of cinematic creation, it represented only a fraction of the intricate artistry required to produce industry-leading visual storytelling. The true magic often lies in the mastery of light—a profound yet frequently underestimated element that shapes mood, defines character, and guides the audience’s emotional journey. This article embarks on an exercise designed to encourage a deeper appreciation for the nuanced lighting techniques and sophisticated tools employed to craft the masterful scenes witnessed in contemporary television and film productions.
The endeavor of dissecting the lighting blueprints of iconic cinematic moments presents a unique challenge. While identifying the cameras used for specific productions is relatively straightforward through industry databases and behind-the-scenes reports, comprehensive lighting breakdowns for individual scenes are rarely made public. This scarcity underscores the proprietary knowledge and unparalleled skill of the great cinematographers, often referred to as Directors of Photography (DPs), whose expertise commands significant compensation and shapes the very fabric of visual storytelling. Despite this inherent difficulty, the analytical process of examining still images from popular movies and TV shows to deduce their lighting schemes offers invaluable educational insights for aspiring filmmakers and enthusiasts alike.
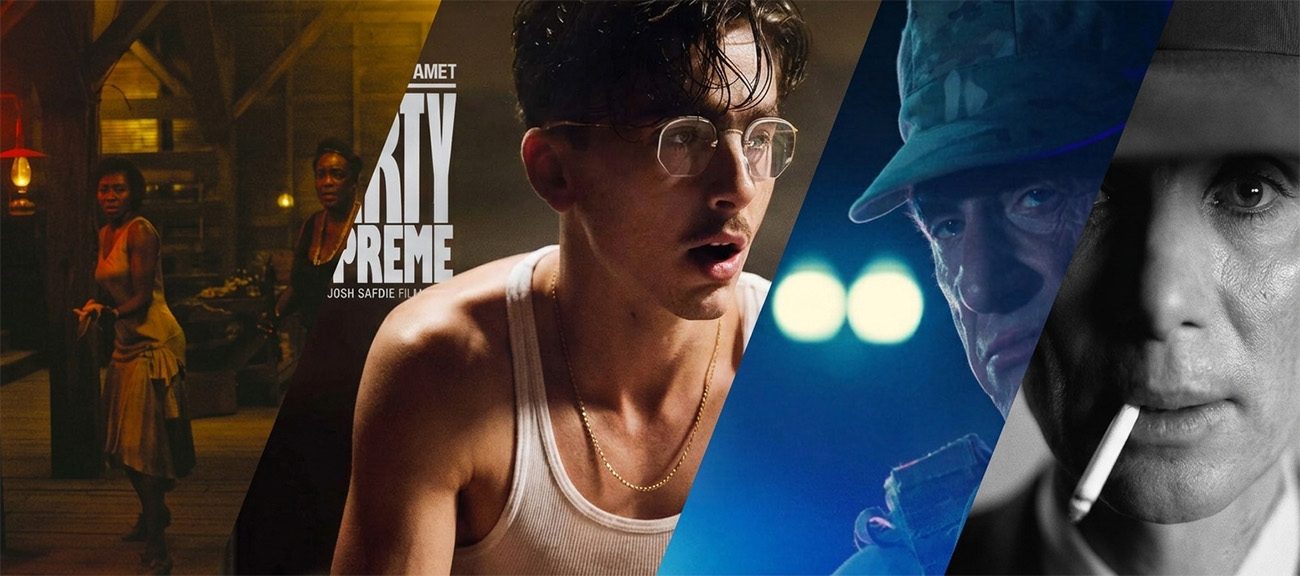
For the purpose of this analysis, the lighting diagrams were meticulously constructed using set.a.light 3d, a specialized 3D modeling software renowned for its user-friendly interface and robust capabilities in deducing and building complex lighting setups for both still photography and video production. It is important to clarify that this is not a sponsored endorsement or a sales pitch; rather, the software is a preferred tool, utilized for years in creating detailed breakdowns of various photographic and cinematic works. The subsequent sections will present several still images from acclaimed films and television series, accompanied by attempts to break down their probable lighting configurations. These analyses are offered purely for educational purposes and should be treated as interpretive exercises, acknowledging that specific gear choices and exact on-set conditions may vary.
The Art and Science of Cinematographic Lighting: Shaping Perception
Lighting in cinematography is far more than mere illumination; it is a powerful narrative device. A skilled Director of Photography uses light to sculpt faces, reveal textures, define spaces, and evoke emotions, subtly influencing how an audience perceives characters and events. The choices made regarding the quality, direction, intensity, and color of light can transform a mundane setting into a dramatic arena or a simple gesture into a profound statement.
Historically, cinematic lighting has evolved from practical, often harsh, stage lights and available natural light in early filmmaking to the sophisticated, highly controlled systems of today. Pioneers like Billy Bitzer, working with D.W. Griffith, experimented with artificial light to create specific moods, while the Golden Age of Hollywood saw the formalization of techniques like three-point lighting (key, fill, and back lights) to enhance subject separation and depth. The mid-20th century brought advancements in lamp technology, with tungsten and later HMI lights offering greater power and color consistency. Today, LED technology, with its unprecedented control over color temperature, hue, and saturation, combined with virtual production environments, continues to push the boundaries of what is visually achievable.
The process of lighting a scene involves a collaborative effort between the DP, the gaffer (chief lighting technician), and their team. It requires not only technical proficiency but also a deep understanding of art, psychology, and narrative. The DP translates the director’s vision into a visual language, often sketching lighting plans or using software simulations, before the gaffer and their crew execute the setup on set, meticulously positioning lights, modifiers, and flags to achieve the desired effect.
Methodology: Deconstructing the Visual Narrative
The analytical approach employed in this exercise involves a systematic process of observation, hypothesis formation, virtual recreation, and refinement. This methodology allows for an educated estimation of complex lighting setups based solely on the visual cues present in a final image:
-
Observation and Analysis: The initial step involves a close examination of the still image. Key indicators include:
- Specular Highlights: Bright reflections on shiny surfaces reveal the size and direction of light sources.
- Shadows: The sharpness, density, and direction of shadows indicate whether the light is hard or soft, and its angle relative to the subject.
- Catchlights: Reflections in the eyes of subjects offer crucial clues about the number, size, and position of primary light sources.
- Fall-off: How quickly light transitions into shadow indicates the distance and intensity of the light source.
- Color Temperature: The warmth or coolness of the light often suggests the type of light source (e.g., tungsten, daylight, practicals) or the use of gels.
- Motivated Lighting: Identifying any visible light sources within the frame (windows, lamps, fires) and assessing how they might influence the overall lighting scheme.
-
Hypothesis Formulation: Based on these observations, a preliminary theory about the lighting setup is developed. This involves inferring the number of lights, their approximate positions (e.g., key, fill, rim), the type of modifiers used (e.g., softbox, grid, bare bulb), and their relative intensities.
-
Virtual Recreation: Utilizing
set.a.light 3d, the hypothesized setup is then built in a virtual environment. This involves placing virtual light sources, adding modifiers, and positioning subjects and architectural elements to mimic the original scene. -
Refinement and Adjustment: The virtual setup is then compared against the reference image. Adjustments are made to light positions, angles, intensities, and modifier types until the rendered output from the software closely matches the visual characteristics of the original scene. This iterative process allows for fine-tuning and validation of the initial hypothesis.
It is crucial to reiterate that while this method allows for a highly accurate approximation, it remains an interpretive exercise. On-set conditions, proprietary rigging, and subtle adjustments made by seasoned professionals cannot be perfectly replicated. Nevertheless, the process significantly deepens one’s understanding of lighting principles and their practical application.
Case Studies: Illuminating Iconic Scenes
Let’s apply this analytical framework to several notable examples from recent film and television.
Marty Supreme – Key Advert Image

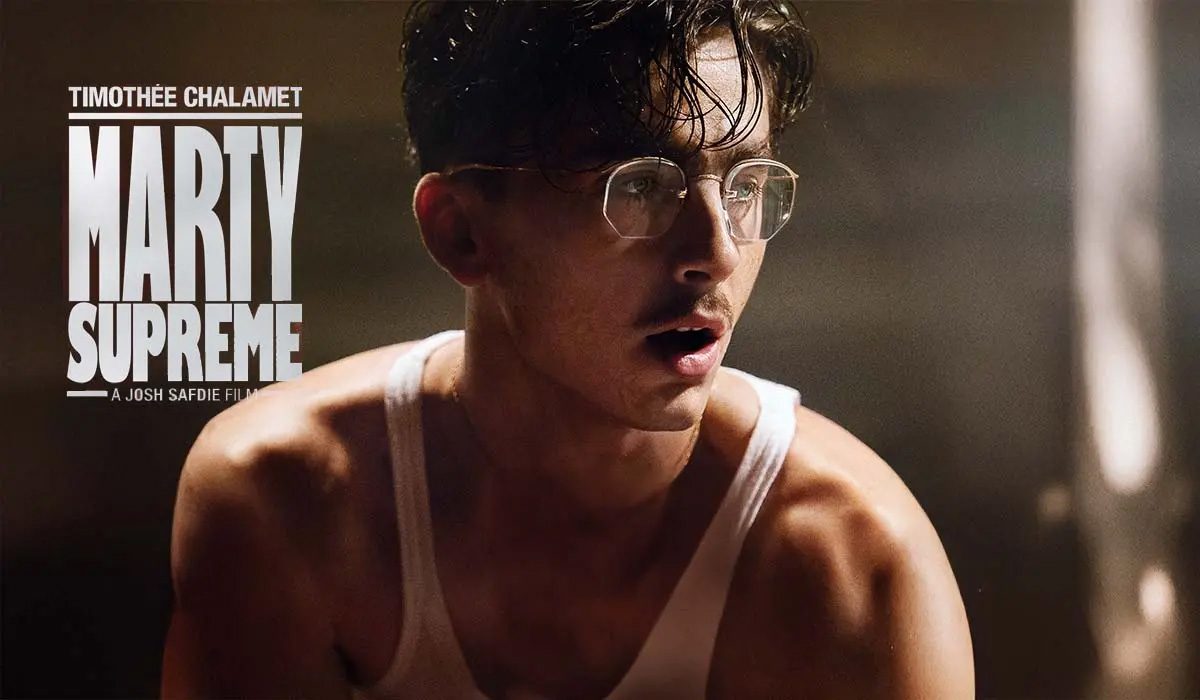
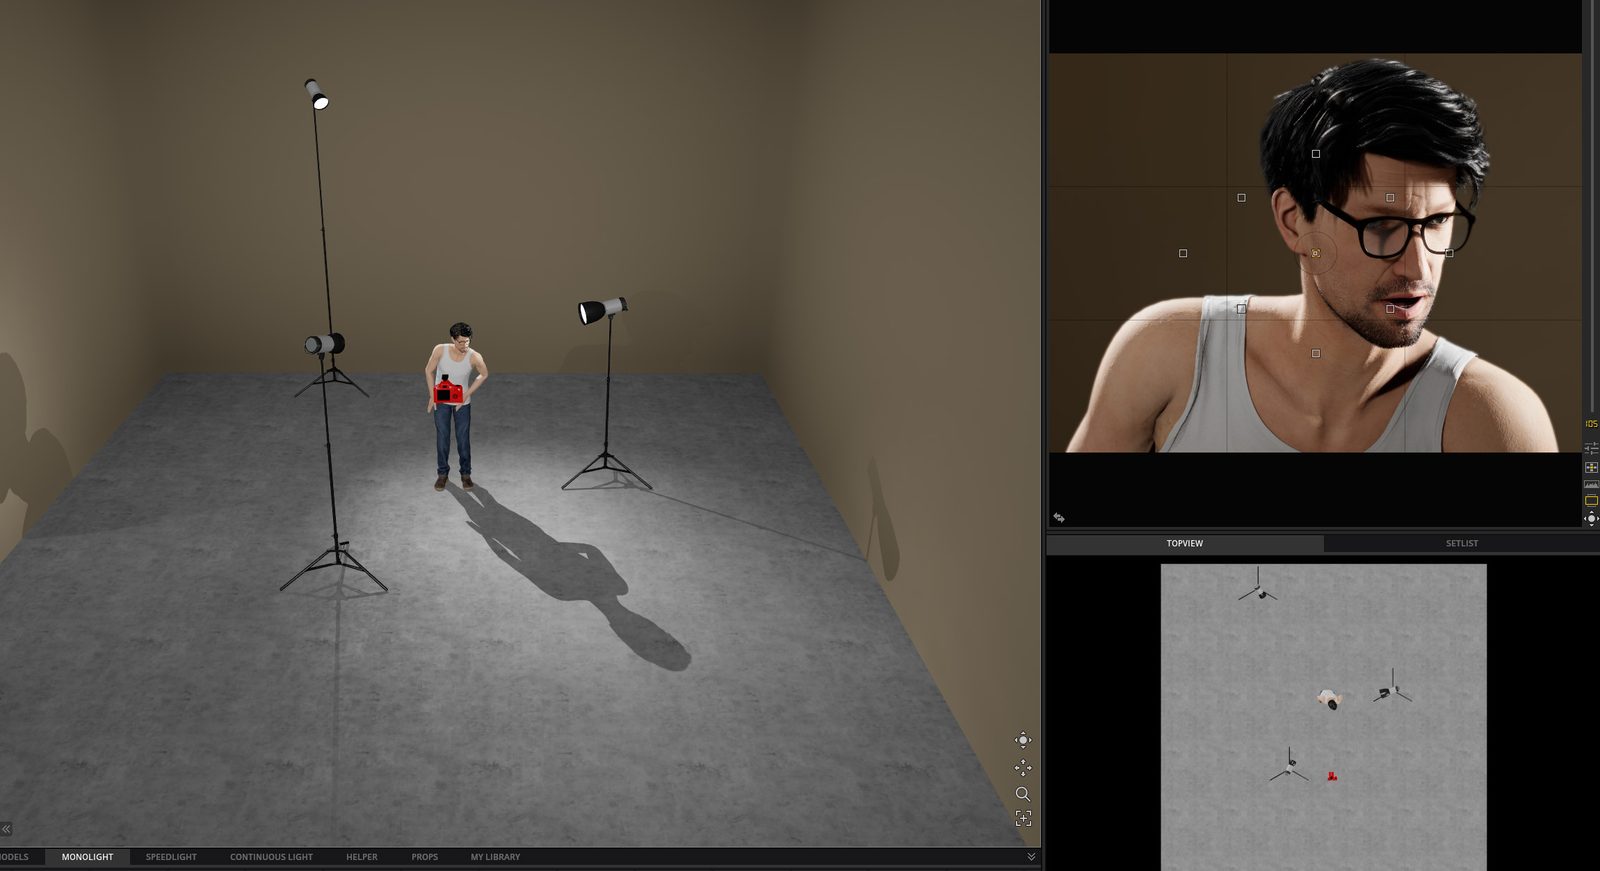
The advertising image for "Marty Supreme" immediately conveys a sense of sharp definition and intensity, primarily achieved through the deliberate use of hard light. The pronounced specular highlights and distinct, crisp shadows—particularly those cast by the subject’s nose and glasses—are clear indicators of undiffused light sources. This choice of hard lighting is often employed in advertising and portraiture to emphasize texture, create drama, and give subjects a commanding presence.
To recreate this effect, a three-light setup was devised, utilizing lights without diffusion to maintain the desired hardness. For the rim light positioned to the subject’s right, a gridded light was selected. The grid is crucial here, as it restricts the light spread, allowing for precise control and focusing the illumination specifically on the shoulders and the contour of the face, creating a striking separation from the background. A similar hard backlight was positioned on the opposite side, contributing to the stark backlighting signature often seen throughout the film, which frequently highlights characters in moments of isolation or confrontation. Finally, a fill light was placed camera left. While the primary intention was a dramatic, high-contrast look, the fill light subtly lifts the shadows on the subject’s left side, ensuring facial features remain discernible and preventing the scene from becoming overly dark or losing crucial detail, thus balancing drama with clarity.

Sinners – Key Group Scene

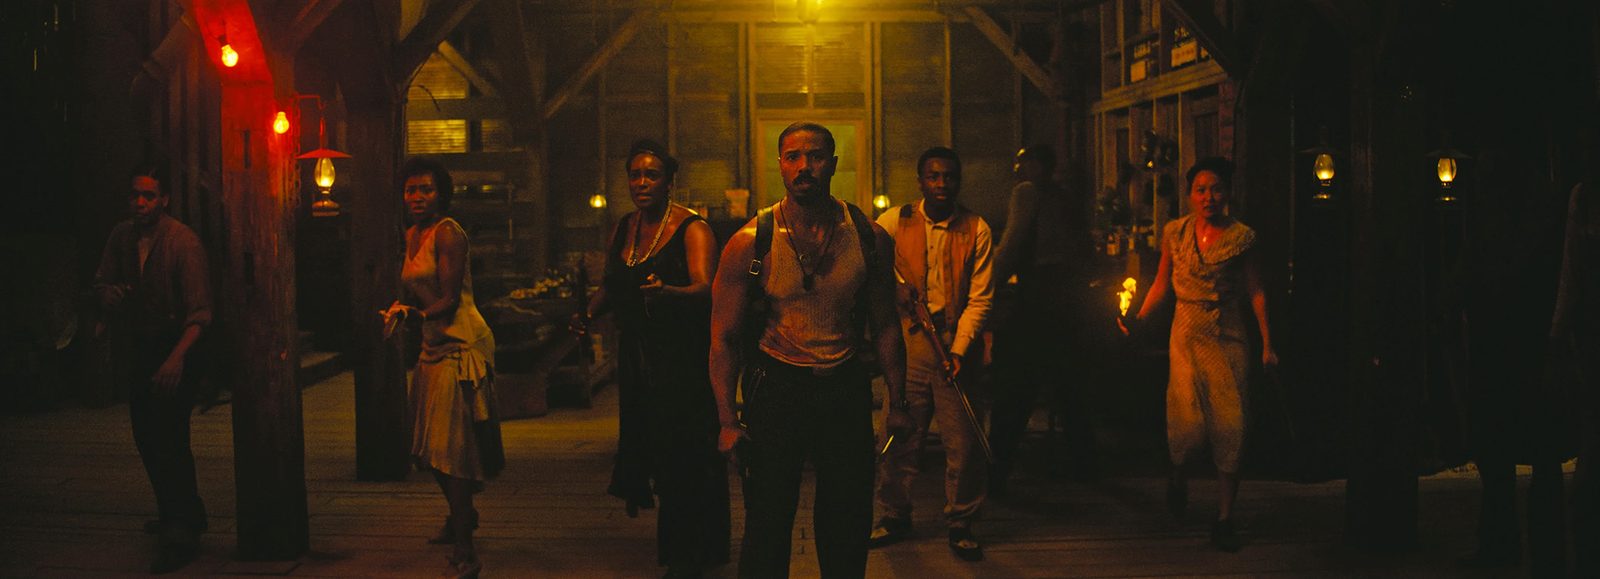
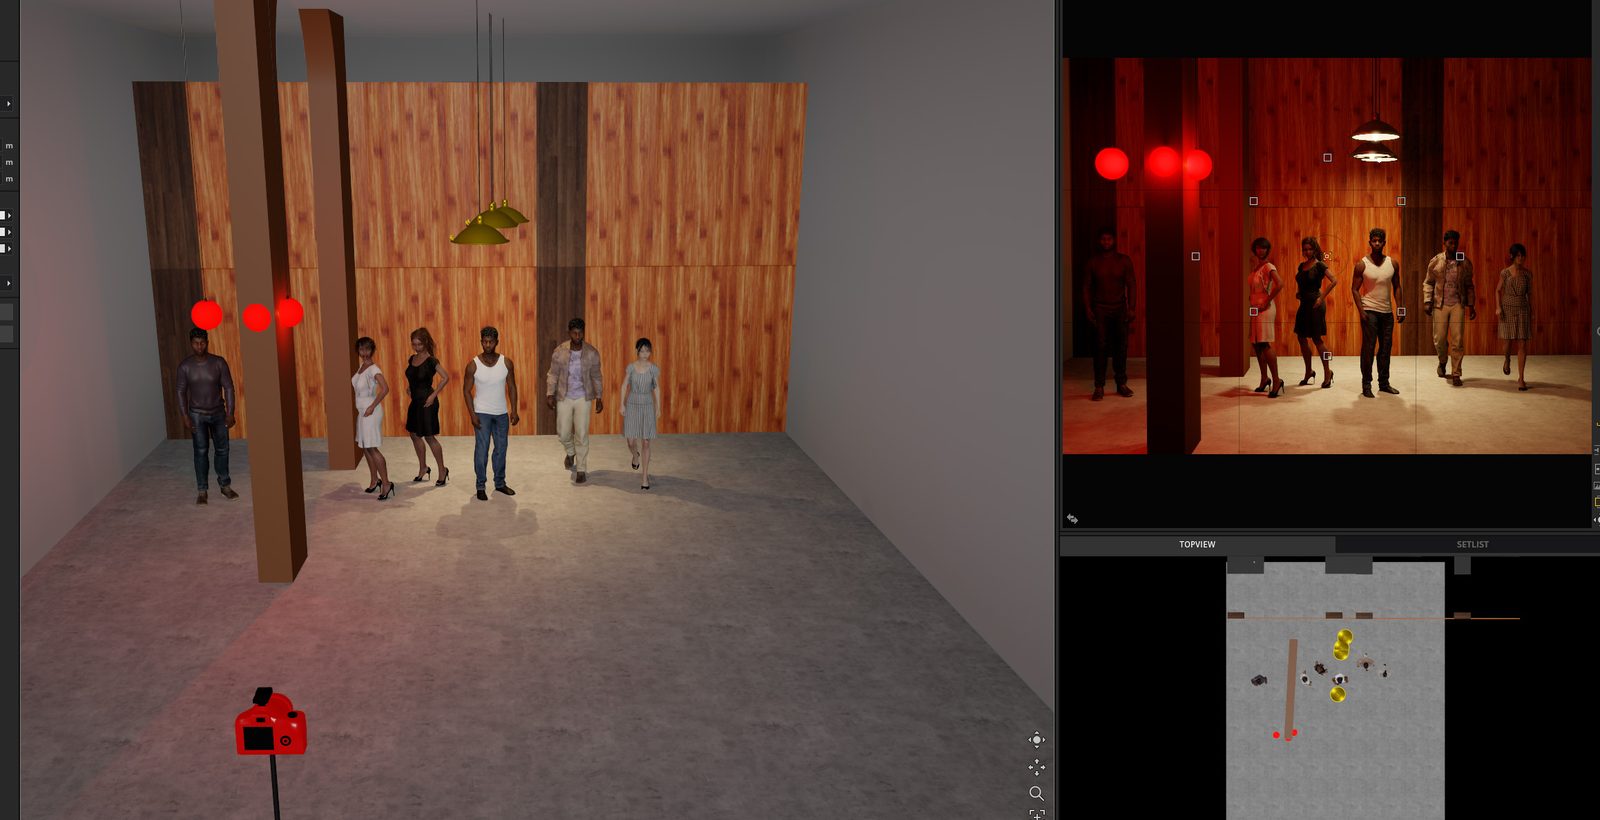
The pivotal "Sinners" scene stands as an exemplary demonstration of cinematic mood-setting through sophisticated lighting. Dominated by the warm, flickering hues of various fire sources complemented by strategically placed red and orange bulbs, the scene is a masterclass in using multicolored illumination to craft a palpable atmosphere of tension, danger, or perhaps a primal gathering. The architectural details of the interior shot are integral, not merely as a backdrop but as elements that actively frame the subjects and add critical depth to the composition.
In the virtual recreation, the initial step involved modeling a basic architectural shell to establish the spatial context and how light would interact with the environment. The placement of subjects in a staggered pattern was crucial for creating visual interest and ensuring that the complex interplay of light and shadow produced contrast across their bodies and faces, preventing a flat, evenly lit appearance. The primary light sources within the frame—likely practicals or specialized cinematic lamps mimicking firelight—were then positioned. Modern RGBWW LED lights, such as the Aputure B7c, are perfectly suited for such an application, offering precise color temperature and hue control to match the desired spectrum of fire and ambient colored light. After establishing the basic placement, the fine-tuning process involved adjusting the power and intensity of each light source to achieve the nuanced balance and atmospheric depth evident in the original scene, truly harnessing the power of motivated and unmotivated colored lighting to tell a story.

Oppenheimer – Hero Shot

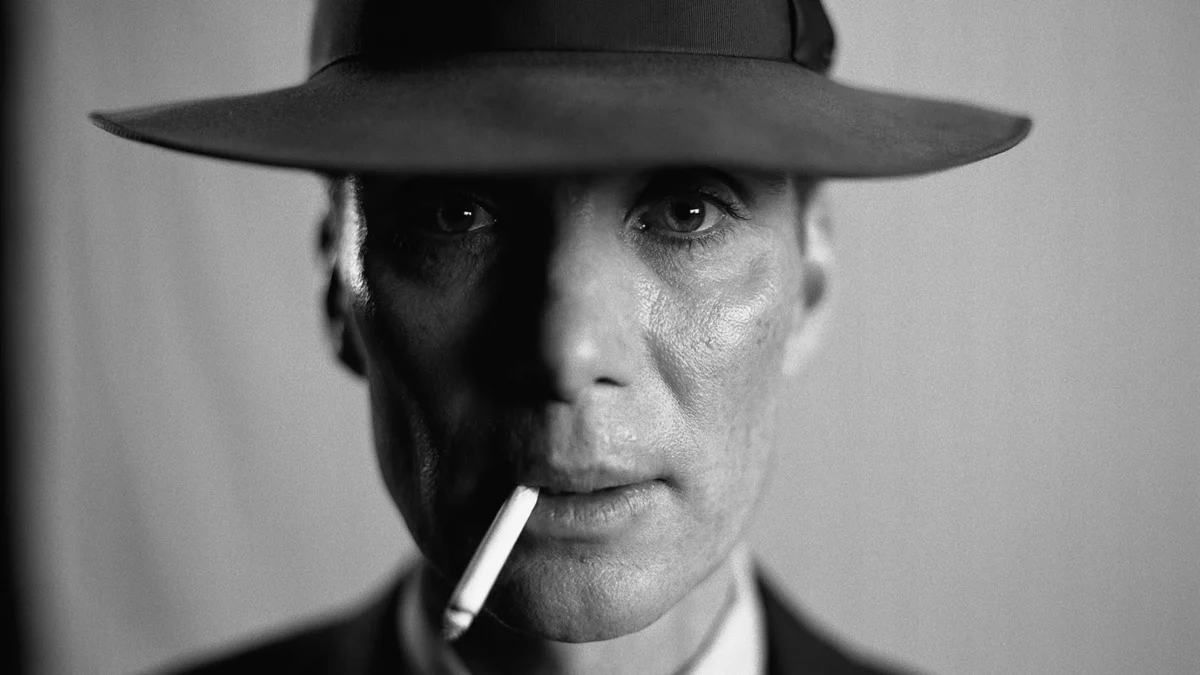
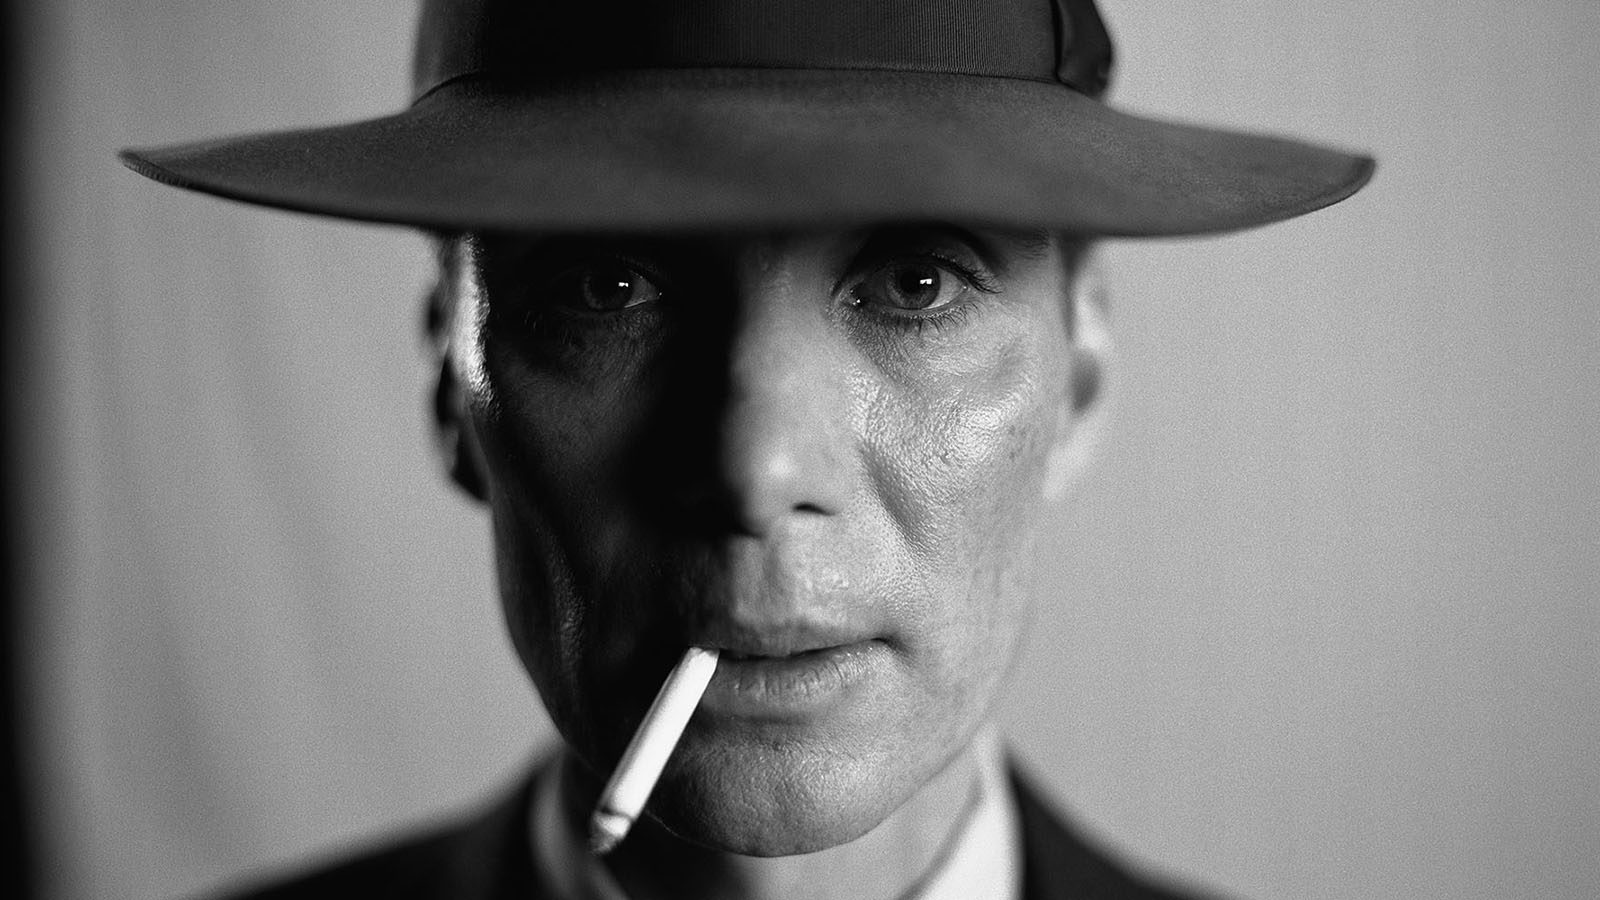
This iconic promotional shot of Cillian Murphy from "Oppenheimer" masterfully uses high contrast and specific lighting techniques to imbue the image with profound drama and character. The interplay between strong rim lighting and distinct split lighting shadows creates a visual metaphor for the character’s internal complexity and the moral weight he carries. Crucially, the catchlights in his eyes are not just reflections but windows, adding depth and emotion to his portrayal.
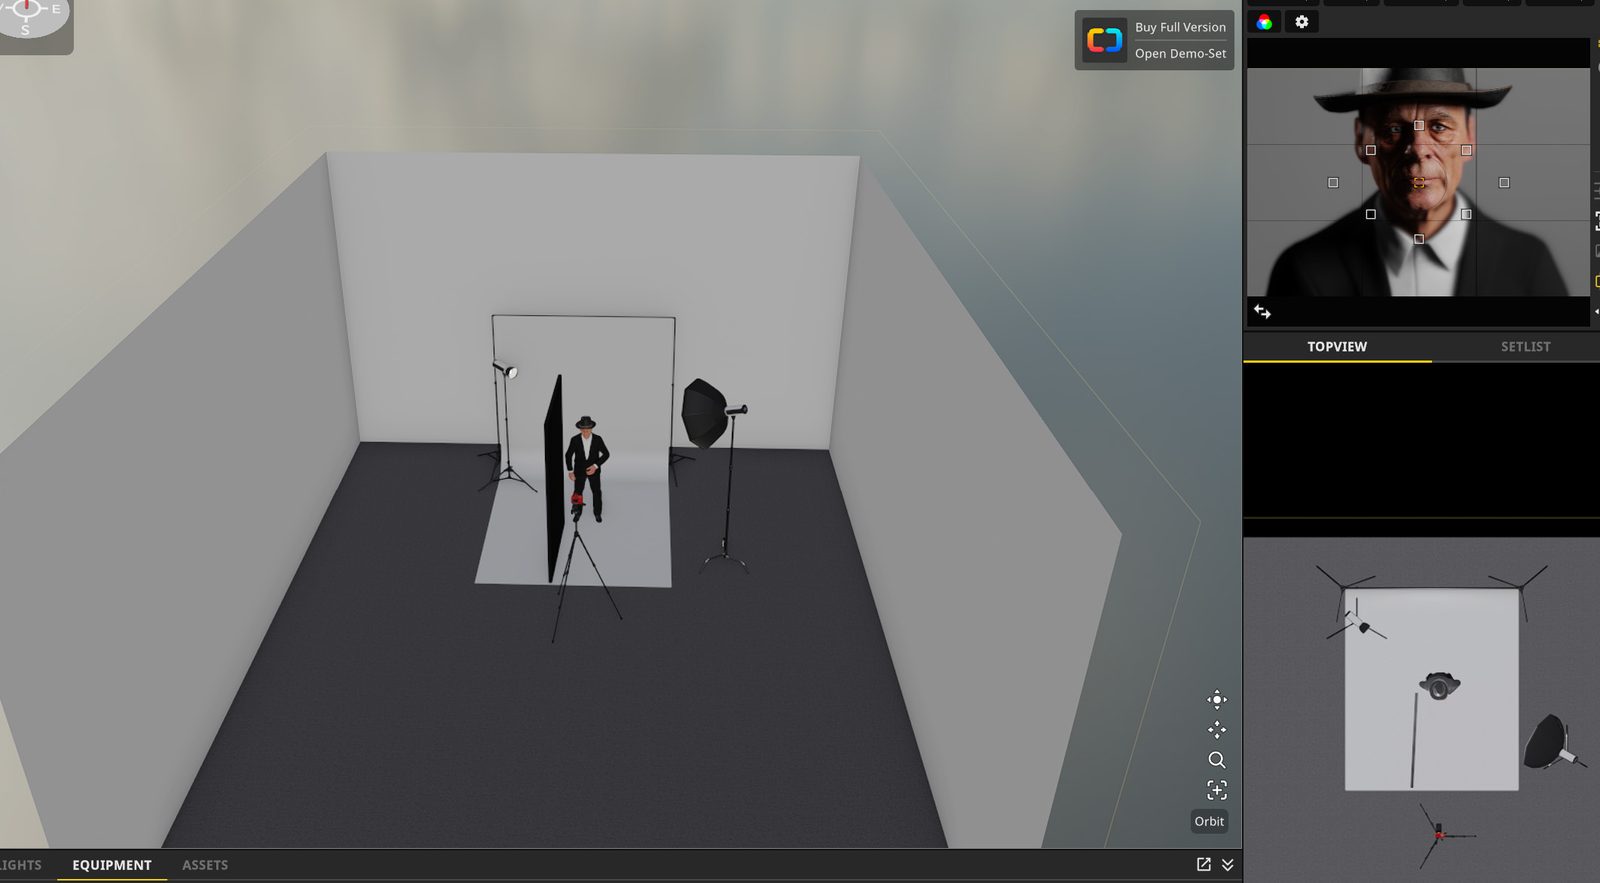
The virtual breakdown begins with a relatively small, gridded Octobox positioned camera right. An Octobox, being larger than a standard reflector, provides a slightly softer yet still directional light, which helps in creating the desirable, slightly elongated catchlights that convey emotion. The grid is indispensable here, as it precisely controls the light spill, ensuring the illumination remains focused and maintains the sharpness of the shadow line characteristic of split lighting (where one side of the face is lit and the other falls into shadow). To further enhance this dramatic contrast, a black blocking board (often called a "negative fill") was placed close to the subject, camera left. This board absorbs ambient light, preventing it from filling in the shadows and thus deepening the contrast between the illuminated and unlit sides of his face. Finally, a bare light from behind and to the left was added to produce a crisp rim light, further separating the subject from the background and adding a luminous edge that accentuates his profile, completing a powerful and emotionally resonant visual.

One Battle After Another – Lockjaw Scene

"One Battle After Another" garnered critical acclaim and the coveted Best Picture award, hailed as a masterclass in cinematography and storytelling. While much of the film embraced natural light on location, its night scenes, particularly those featuring Sean Penn’s menacing antagonist, Lockjaw, were meticulously lit to amplify the narrative. The stark, hard shadows cast across Sean Penn’s face in this scene are unequivocal evidence of predominantly undiffused light sources, contributing to the character’s unsettling and dangerous aura.
The reconstruction of this scene began by establishing the harsh rim lights on each side of the subject. Crucially, one of these rim lights was given a blue hue, serving as a powerful piece of motivated lighting, simulating the flashing lights of a police car from behind. This detail not only adds realism but also heightens the sense of urgency and confinement surrounding the character. Following the placement of these defining rim lights, a bare, undiffused light was introduced to the front, powered down significantly to act as a subtle fill. Its purpose was to selectively lift some of the deepest shadows on Lockjaw’s face, revealing just enough detail to convey his expressions without diminishing the overall hard, dramatic mood. Finally, the pronounced horizontal lens flare on the right side of the frame is a signature characteristic of anamorphic lenses, which cinematographers often choose for their distinctive aesthetic qualities, adding a layer of cinematic grandeur and a subtly distorted perspective that complements the film’s tone. This combination of harsh lighting, motivated color, and specific lens choice culminates in a scene that is both technically brilliant and profoundly impactful.
<source type="image/avif" srcset="/blog/media-variant/2026/04/Lockjaw-Lighting-1-400w.avif 400w, /blog/media-variant/2026/04/Lockjaw-Lighting-1-800w.avif 800w, /blog/media-variant/2026/04/Lockjaw-Lighting-1-1200w.av