For landscape photographers seeking subjects that combine raw power with delicate aesthetics, waterfalls present an unparalleled opportunity. These natural wonders, with their constant motion, intricate textures, and ambient mist, offer a canvas for capturing dynamic beauty, challenging photographers to blend technical precision with artistic vision. The pursuit of compelling waterfall imagery does not necessarily demand specialized, high-end equipment or expeditions to world-renowned cascades; instead, it emphasizes a fundamental understanding of photographic principles, a keen eye for composition, and a commitment to safety. This guide delves into the essential aspects of waterfall photography, from gear selection and environmental awareness to advanced camera settings and creative approaches, empowering photographers to transcend mere documentation and craft truly captivating images.
I. Essential Equipment and Strategic Selection for Dynamic Landscapes
While the core of successful waterfall photography lies in skill and vision, the right tools significantly enhance the creative process. Beginners often find that their existing interchangeable-lens cameras, even those paired with a standard kit lens, offer ample control for initial explorations. Modern advanced compact cameras and even many smartphones now provide sufficient manual settings to experiment with shutter speeds, a critical element in rendering water movement. The key is to first understand the capabilities of current equipment before investing in upgrades.
Lens selection plays a pivotal role in shaping the narrative of a waterfall photograph. A wide-angle lens, typically ranging from 16mm to 35mm on a full-frame sensor, is invaluable for capturing the grandeur of a waterfall within its broader landscape, drawing the viewer into the scene and emphasizing scale. Conversely, a telephoto lens, with its narrower field of view, allows for the isolation of specific sections of the falls, highlighting intricate details, textures, or compressing distant background elements to create a more intimate perspective. Photographers with a single lens are encouraged to master its versatility before considering additional purchases.
The tripod stands as an indispensable accessory, particularly when venturing into the realm of slower shutter speeds. By rigidly holding the camera in place, a sturdy tripod eliminates camera shake, ensuring that only the moving elements—the water—are blurred, while stationary surroundings remain tack sharp. Beyond its technical function, a tripod facilitates a more deliberate and thoughtful compositional process, allowing the photographer to fine-tune framing without the pressure of hand-holding.
Beyond the camera and lenses, a few crucial accessories can dramatically elevate image quality and mitigate environmental challenges. A circular polarizing filter (CPL) is highly recommended for its ability to reduce reflections from wet rocks and the surface of the water. This reduction in glare enhances detail, enriches colors, and allows the camera sensor to "see" through surface reflections, revealing the submerged textures or the true color of the wet stone. Neutral density (ND) filters, often described as "sunglasses for your lens," are equally vital. They reduce the amount of light entering the camera, enabling the use of longer shutter speeds even in bright conditions, which is essential for achieving the signature silky water effect without overexposing the scene. ND filters come in various strengths (stops), with a moderate strength being a versatile starting point.
When assembling a dedicated kit, a mirrorless camera paired with a versatile wide-angle lens (e.g., 16mm equivalent), a robust tripod, a remote shutter release to avoid physical contact with the camera, a CPL, and a reliable ND filter form a potent combination. Understanding filter thread sizes (e.g., ø67mm) is crucial for purchasing compatible filters; this information is typically printed on the front of the lens barrel. Finally, practical accessories like extra batteries, ample memory cards, multiple microfiber cloths for lens cleaning (especially in misty environments), and waterproof covers for both camera and bag are non-negotiable for a successful and frustration-free outing.
II. Location Scouting and Environmental Understanding
Identifying suitable waterfall locations extends beyond famous landmarks. State and national parks, local preserves, hiking trails, and even lesser-known cascades can provide exceptional photographic opportunities. In fact, smaller, more accessible waterfalls often serve as ideal learning grounds, allowing photographers to experiment with compositions and settings without the pressure of capturing an "iconic" shot.
Modern digital tools are invaluable for location scouting. Mapping applications, hiking platforms, park websites, and online photography communities offer rich resources. Searching for terms like "waterfall," "cascade," or "falls" on maps can reveal potential sites. Reviewing trail descriptions and photographs from other visitors provides crucial insights into accessibility, terrain, and the visual character of the falls. Satellite imagery, in particular, can help identify streams, elevation changes, and hidden features not apparent on standard maps.
Crucially, the condition of a waterfall is highly dynamic and directly influenced by hydrological cycles and seasonal changes. Snowmelt and recent rainfall significantly increase water flow, transforming a gentle cascade into a powerful torrent, while prolonged dry spells can reduce it to a mere trickle. Seasonal shifts also redefine the surrounding landscape: vibrant spring greenery, lush summer foliage, fiery autumn colors, or crystalline winter ice each offer distinct aesthetic possibilities. Consulting recent weather patterns and seasonal water flow reports is as important as selecting the location itself.
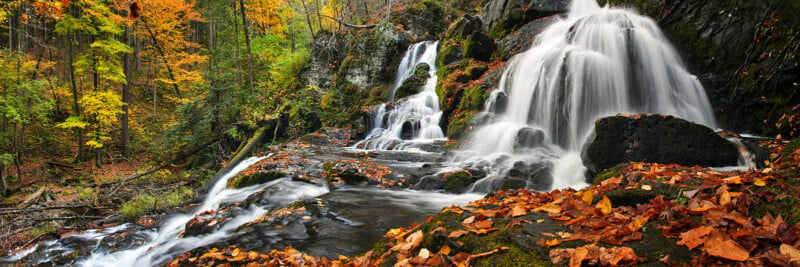
Pre-visit research should also encompass trail conditions, access points, parking availability, and any reported closures or safety warnings. A waterfall that appears breathtaking in a photograph might involve a challenging or unsafe approach. Understanding the hike’s length, elevation gain, and terrain type helps in making informed decisions about which gear is practical to carry, balancing photographic ambition with physical limitations and safety.
III. Mastering Light and Atmospheric Conditions
Light is the ultimate sculptor in photography, and its quality can profoundly transform the perception of a waterfall. Counterintuitively, bright, direct sunlight is often less than ideal for waterfall photography. Overcast conditions, where clouds act as a vast natural diffuser, are frequently preferred. This soft, even light minimizes harsh contrasts between bright water and shadowed rocks, making it easier to retain detail across the entire scene and achieve a balanced exposure.
Experienced photographers often seek partly cloudy conditions, particularly when clouds hover on the cusp of full overcast. This "sweet spot" offers the best of both worlds: sufficient cloud cover to soften harsh light while intermittently allowing warmer, directional sunlight to filter through. This dynamic interplay of light can create dramatic highlights, add depth, and imbue the scene with a captivating glow, especially on autumn foliage.
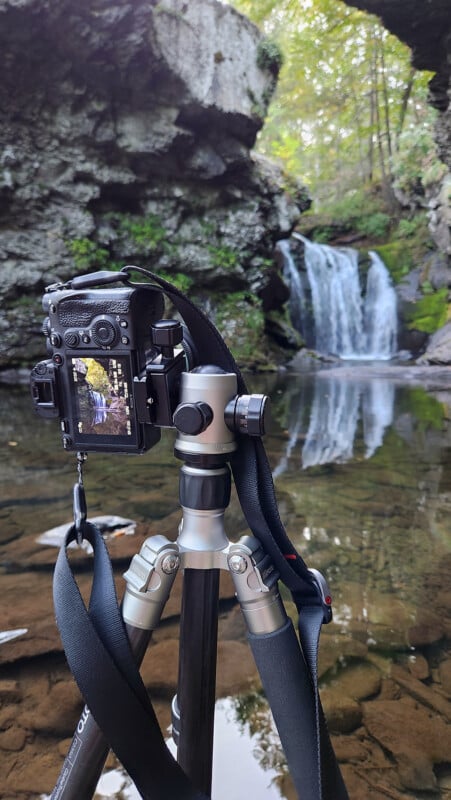
The "golden hour"—the period shortly after sunrise or before sunset—offers another prime window for waterfall photography. Cooler morning temperatures can generate atmospheric mist around the water, creating an ethereal ambiance as the falls gradually emerge from the soft light. In the late afternoon, low-angle sunlight can illuminate surrounding trees and autumn leaves, enhancing their vibrant reds, oranges, and yellows against the darker rocks and flowing water.
Direct, midday sunlight often presents significant challenges. The high contrast between blown-out highlights on the water and deep shadows in the surrounding forest can exceed a camera’s dynamic range, making it difficult to capture a well-exposed image in a single shot. In such conditions, bracketed exposures for High Dynamic Range (HDR) processing might be necessary, though soft, indirect light generally yields more pleasing results.
Beyond sunlight, the weather itself can become an integral element of the photograph. Rain darkens rock surfaces and foliage, intensifying their colors and adding a sense of mood and drama. Mist and spray, inherent to waterfall environments, can create an atmospheric veil, softening edges and imparting an almost painterly quality to the scene. While challenging, working safely in light rain or misty conditions can produce uniquely evocative images. Ultimately, adapting to the available light and understanding its impact on texture, depth, and mood is more rewarding than rigidly waiting for "perfect" conditions.
IV. Prioritizing Safety in Dynamic Environments
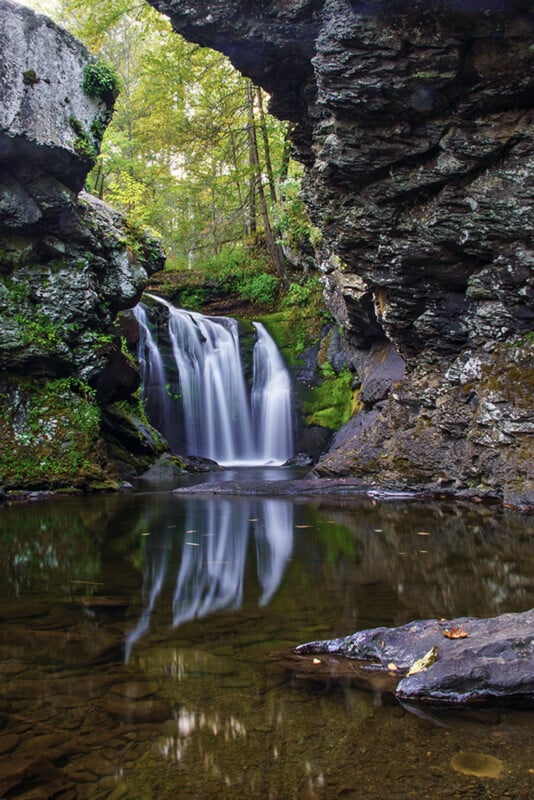
The allure of a perfect shot must never overshadow the paramount importance of safety. Waterfall environments are inherently hazardous. Rocks, even those appearing dry, are often covered in a thin, imperceptible layer of moisture or algae, rendering them treacherous. Fast-moving water, particularly near plunge pools and currents, possesses immense, deceptive power. Assumptions about water depth or current strength are perilous.
Photographers must resist the temptation to climb onto wet, unstable rocks or venture near cliff edges for a better angle. Designated trails and viewing platforms exist for a reason and should be respected. Water levels can rise rapidly and unexpectedly after heavy rainfall upstream, even if local conditions appear benign. The advice is clear: if a position feels unstable or dangerous, find an alternative composition. No photograph is worth a fall, injury, or worse. A good indicator of overextension is when attention shifts from secure footing to protecting camera equipment.
Adherence to posted warnings and trail restrictions is mandatory. Closed areas are typically off-limits due to legitimate dangers. When exploring unfamiliar or challenging terrain, photographing with a companion significantly enhances safety. Furthermore, fatigue can impair judgment and footing, making the return journey potentially more hazardous than the approach. Allocating ample time for safe ingress and egress is crucial.
V. Preparation for the Elements: Attire and Gear Protection
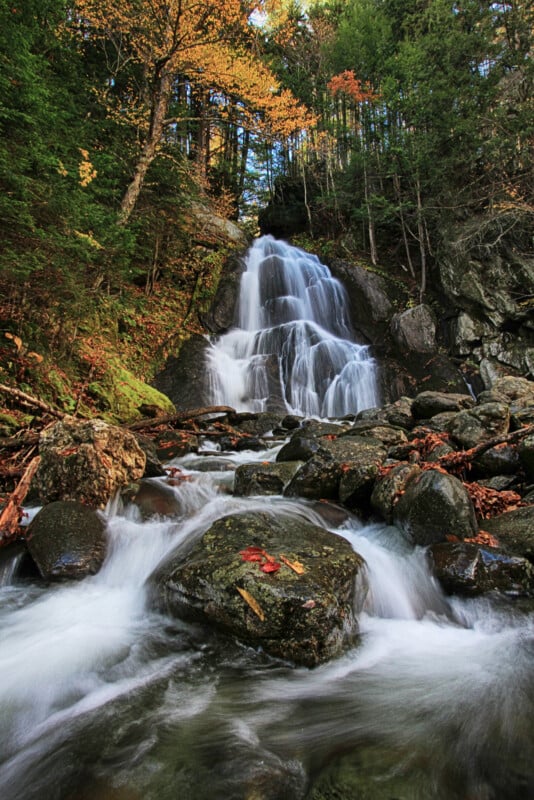
Waterfall environments are almost always wet, regardless of the weather forecast. Constant mist and spray saturate rocks, trails, and vegetation, often making the area cooler than anticipated. Therefore, dressing appropriately for the microclimate of the falls, rather than just the general weather, is essential.
Footwear with superior traction is non-negotiable, given the prevalence of uneven, wet, and slippery surfaces. Water-resistant or waterproof outer layers are highly recommended, and quick-drying synthetic fabrics are preferable to cotton for base layers, especially in cool, damp conditions. Carrying a waterproof bag or a pack liner with a dry change of clothes, particularly for longer excursions, can prevent discomfort and potential hypothermia if unexpected immersion occurs. A small, absorbent towel is also surprisingly useful for drying hands or equipment.
Camera gear, too, requires robust protection. Continuous spray can accumulate on the camera body, lenses, and controls, compromising functionality and image quality. Droplets on the front lens element are a common culprit for ruined shots. A waterproof camera cover offers excellent protection during heavy spray or rain, while a lens hood provides a first line of defense for the front element. Keeping several clean microfiber cloths readily accessible allows for immediate wiping of droplets, which can accumulate subtly and become visible only after reviewing images.
Camera bags, even those marketed as water-resistant, often have limitations. Many rain covers leave straps and the back of the bag exposed. For genuinely wet conditions, encasing the entire camera bag within a larger, purpose-designed dry bag offers superior protection. When moving between shooting positions, storing the camera in its bag prevents continuous exposure to spray. Exercising extreme caution when changing lenses or opening the camera bag in misty conditions minimizes the risk of internal water ingress.
VI. Strategic Composition: Beyond the Obvious
A common pitfall for beginners is to simply capture the first obvious view of the waterfall. However, the most compelling images often emerge from a more deliberate and exploratory approach. Before setting up any equipment, take time to safely walk around the scene. Observe the waterfall from various heights, angles, and distances.
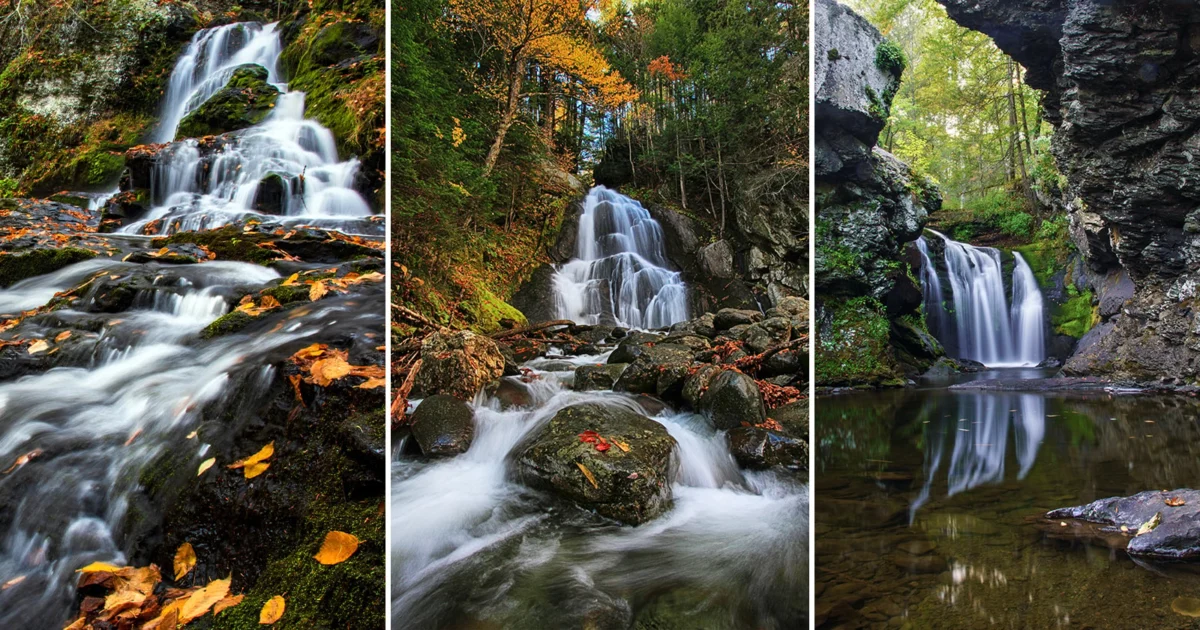
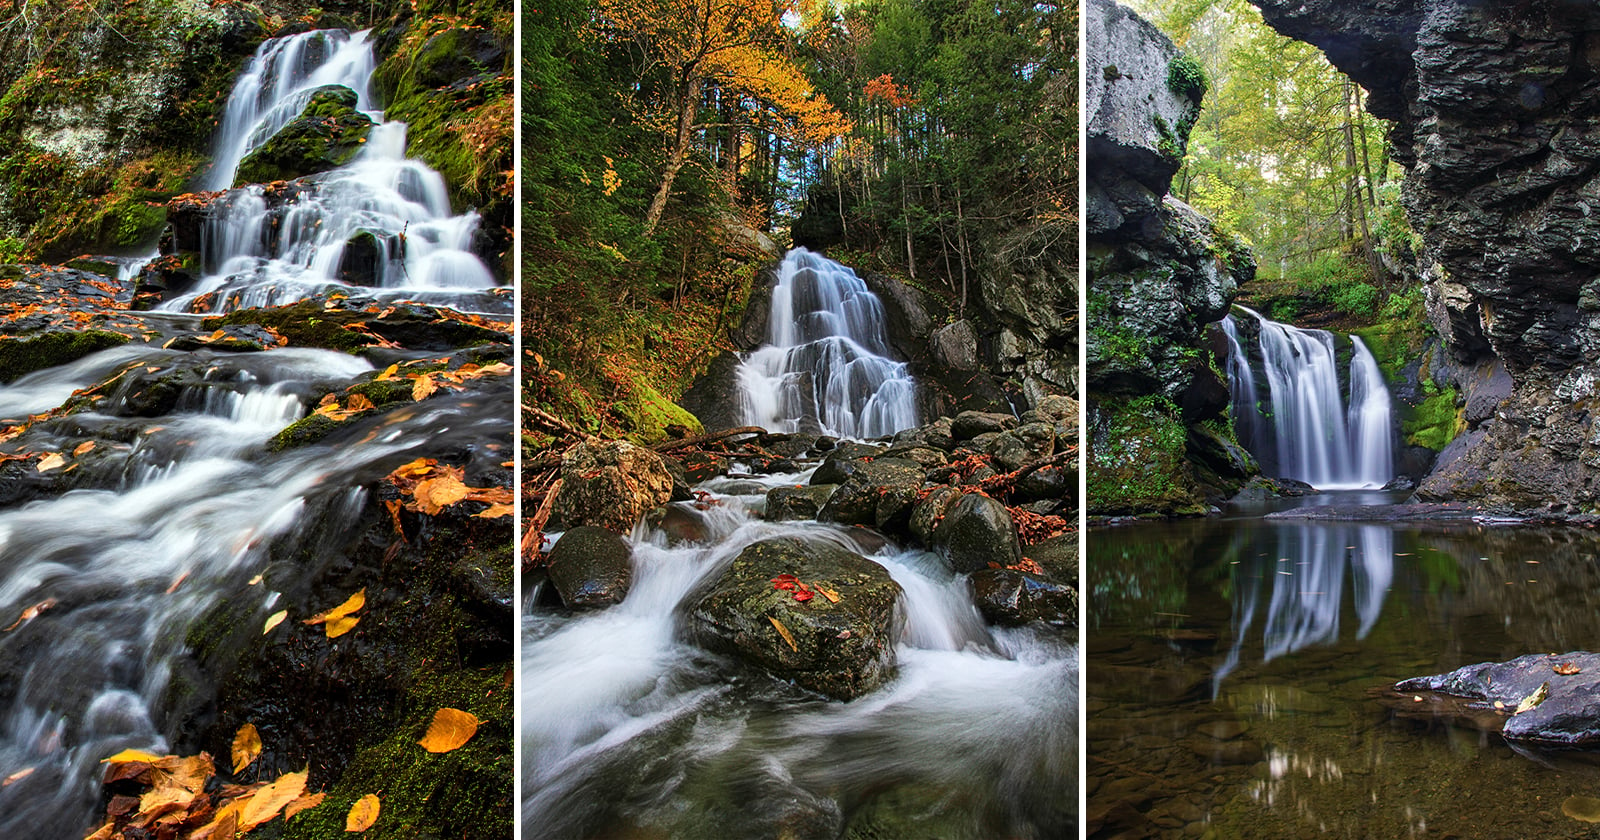
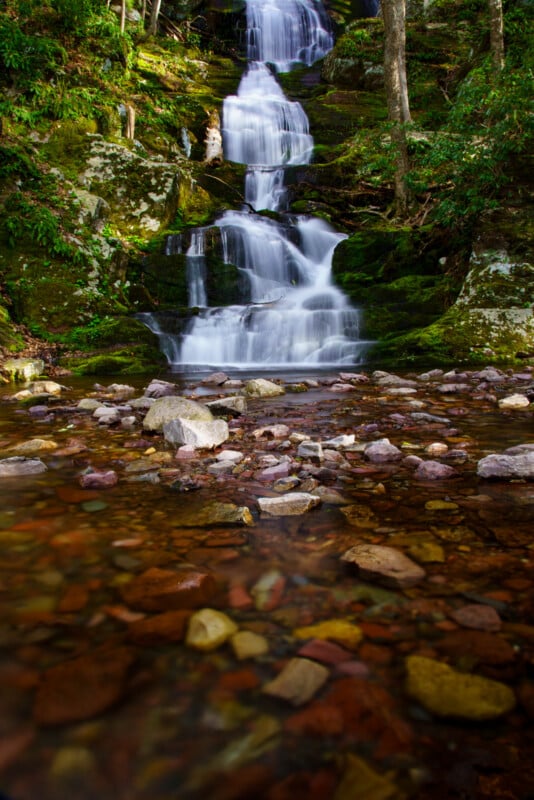
Look for natural foreground elements that can add depth and guide the viewer’s eye into the frame. These might include moss-covered rocks, fallen leaves, small pools, intricate root systems, or miniature cascades leading to the main fall. Experiment with both horizontal and vertical compositions. A vertical frame can emphasize the sheer height and power of a tall waterfall, while a horizontal orientation can provide greater context, incorporating more of the surrounding landscape and creating a sense of expansiveness. The waterfall itself doesn’t always need to be the sole dominant feature; sometimes, a wider landscape shot where the falls are one harmonious element within a rich environment proves more impactful.
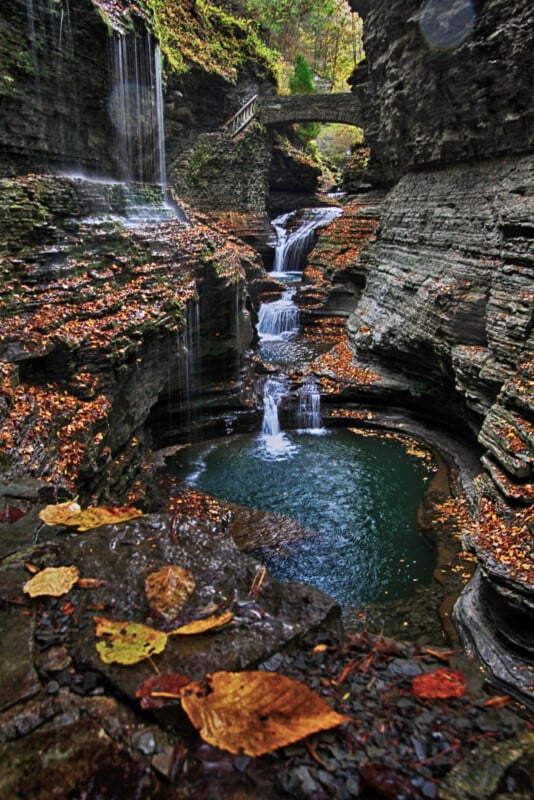
Pay attention to seasonal details—autumn foliage, blooming flowers, unique rock formations, or even man-made structures like old mills or bridges—that can anchor the waterfall within its unique setting. Resist the urge to rely solely on zooming the lens; physically moving a few feet can dramatically alter the relationship between foreground, midground, and background, creating entirely new compositional possibilities, always remembering to prioritize stable and safe footing.
VII. The Art of Shutter Speed: Freezing vs. Flowing Water
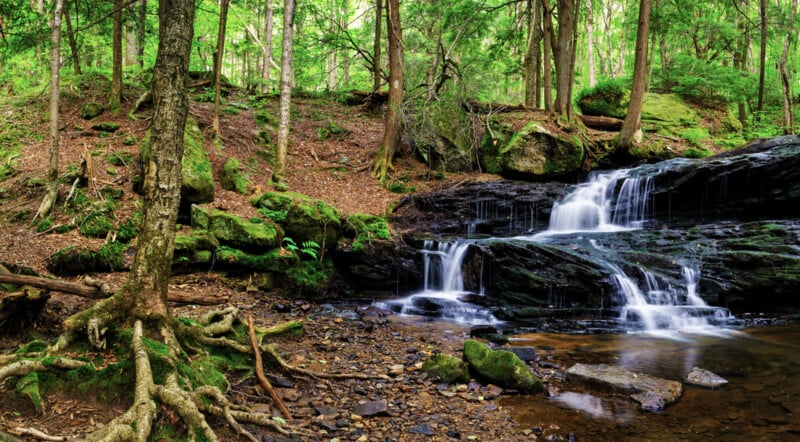
Shutter speed is the single most critical creative control in waterfall photography, dictating how the movement of water is rendered. It controls the duration the camera’s shutter remains open to record light. A fast shutter speed, such as 1/500th of a second or quicker, freezes motion, capturing individual water droplets and splashes with crisp detail. Conversely, a slower shutter speed keeps the shutter open longer, allowing the continuous movement of water to blur into ethereal streaks.
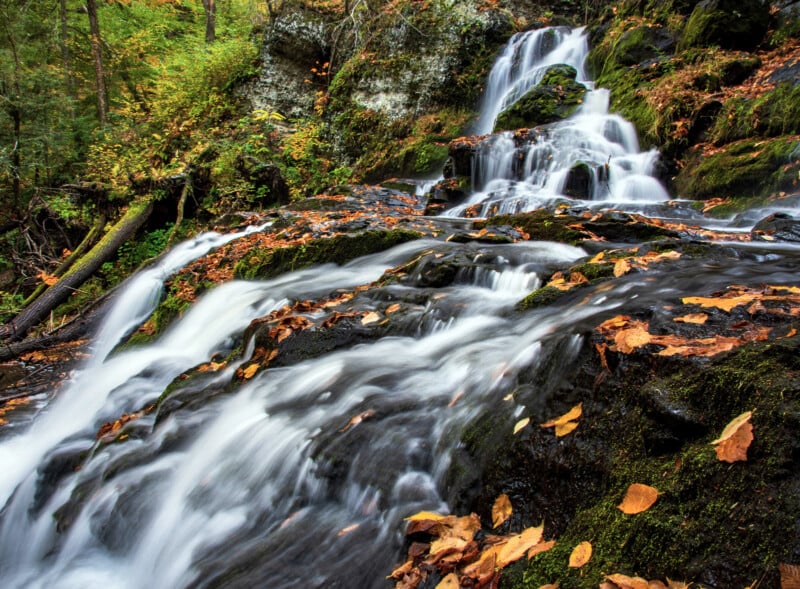
The optimal shutter speed is relative to the water’s velocity and the desired aesthetic. Rapidly flowing water requires less time to achieve visible motion blur. A moderately slow shutter speed (e.g., 1/15th to 1/2 second) can create flowing streaks while still retaining some textural elements, lending a dynamic yet tangible feel. Longer exposures (e.g., 1 to 30 seconds or more), often achieved with the aid of ND filters, smooth the water into the familiar silky, milky appearance, transforming the torrent into a soft, dreamlike veil.
Experimentation is key. Begin by freezing the motion, then progressively slow the shutter speed through various increments (e.g., 1/250, 1/60, 1/15, 1/2, 1, 2 seconds) to observe the changing effect. It is important to note that the slowest possible shutter speed is not always the best. Excessive blurring can sometimes strip the water of its character and texture, rendering it featureless. The goal is to find a balance that best conveys the movement and mood of the specific waterfall.
VIII. Camera Modes for Creative Control and Technical Mastery
To intentionally manipulate the appearance of water, photographers must move beyond automatic camera modes. For those new to manual controls, Shutter Priority (often labeled "S" or "Tv") is an excellent starting point. In this mode, the photographer selects the desired shutter speed, and the camera automatically calculates the appropriate aperture for a balanced exposure. This allows for focused experimentation with motion blur without the added complexity of managing all exposure parameters simultaneously. For instance, a photographer can cycle through 1/500s, 1/125s, 1/30s, 1/2s, and several seconds, directly observing the resultant changes in water movement.
As comfort with exposure grows, Manual mode ("M") offers unparalleled creative control. Here, the photographer independently sets shutter speed, aperture, and ISO. This comprehensive control is particularly advantageous for waterfall photography, enabling precise management of motion blur while maintaining consistent depth of field and noise levels. A common starting point in Manual mode for landscape photography on a tripod is ISO 100 (for minimal noise) and an aperture between f/8 and f/11 (for good depth of field), with shutter speed then becoming the primary variable for artistic expression.
IX. Leveraging Tripods and Remote Releases for Impeccable Stability
The indispensable role of the tripod in waterfall photography, especially for long exposures, cannot be overstated. When the shutter remains open for fractions of a second or several seconds, even the slightest hand movement can introduce camera shake, resulting in a blurry image. A stable tripod ensures that only the moving water is blurred, while the static elements of the scene remain perfectly sharp.
Once the camera is securely mounted, minimizing physical interaction during exposure is crucial. A remote shutter release, either wired or wireless, allows the photographer to trigger the shutter without touching the camera, thereby eliminating any potential vibration. In the absence of a remote, the camera’s self-timer (e.g., 2-second delay) serves a similar purpose, allowing any vibrations from pressing the shutter button to dissipate before the exposure begins.
Modern cameras and lenses often incorporate image stabilization systems. While beneficial for handheld shooting, their efficacy when the camera is tripod-mounted varies. Some systems automatically detect tripod use and disable stabilization, while others may require manual deactivation to prevent internal components from attempting to compensate for non-existent movement, which can paradoxically introduce blur. Consulting the camera or lens manufacturer’s recommendations is advisable.
X. The Power of Filters: CPL and ND in Detail
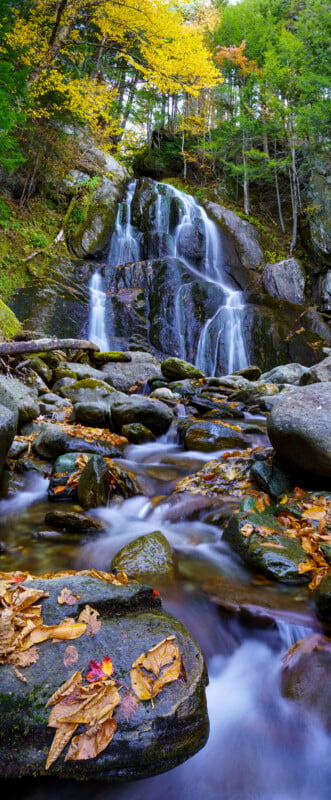
Beyond their initial introduction, the nuanced application of circular polarizing (CPL) and neutral density (ND) filters warrants deeper exploration. A CPL works by filtering polarized light, effectively reducing non-metallic reflections. In a waterfall environment, this translates to minimizing glare on wet rocks, foliage, and the water’s surface, enhancing color saturation, increasing contrast, and revealing details that would otherwise be obscured by bright reflections. By rotating the outer ring of the filter, the photographer can observe and adjust the degree of polarization, optimizing the effect for each unique composition. While CPLs can also deepen blue skies, their primary utility at waterfalls lies in reflection management and color enhancement. It’s a tool to be used judiciously, as sometimes reflections are an intentional part of the desired aesthetic.
Neutral density (ND) filters are light-reducing tools that come in various strengths, measured in "stops." Each stop halves the amount of light entering the lens, allowing for a corresponding doubling of the shutter speed. For instance, a 3-stop ND filter permits an 8-times longer exposure, while a 10-stop filter allows for a 1024-times longer exposure. This enables photographers to achieve significantly slower shutter speeds for the silky water effect, even in bright daylight, without overexposing the image. The choice of ND filter strength depends on the ambient light and the desired degree of blur. Starting with a moderate strength (e.g., 3-stop or 6-stop) is often recommended for versatility. It’s crucial to remember that the objective is not simply the longest possible exposure, but rather the exposure that best captures the intended movement and preserves the water’s character.
XI. Beyond the Silky Veil: Diverse Water Photography
While the classic silky water effect is undeniably popular and aesthetically pleasing, it represents only one facet of waterfall photography. Encouraging experimentation beyond this single aesthetic can unlock a broader range of creative expressions.
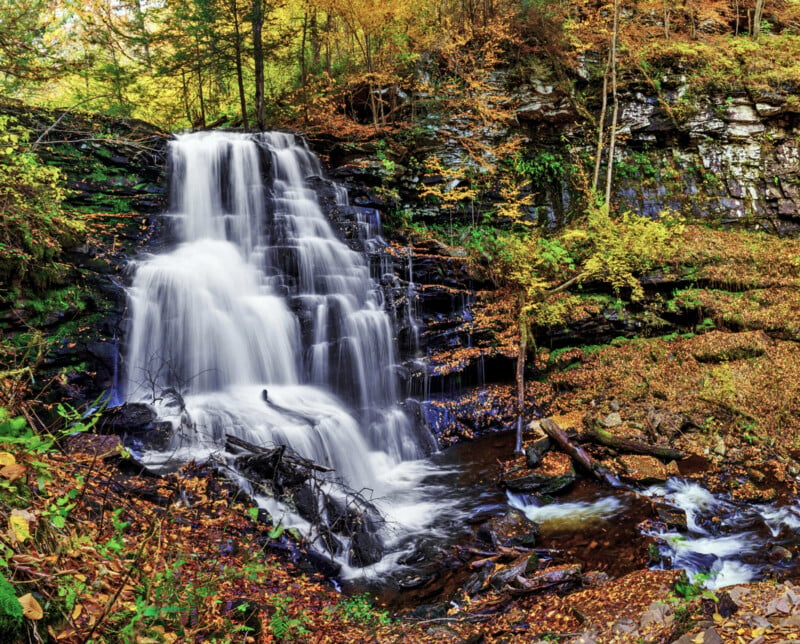
Photographers can experiment with fast shutter speeds to freeze individual droplets and splashes, capturing the raw power and intricate details of the water’s impact. A moderately slow shutter speed can retain some texture and definition while still conveying movement, offering a balance between crispness and flow. Utilizing a telephoto lens to isolate abstract patterns within the moving water or focusing on specific sections of the falls can yield unique, intimate compositions.
Furthermore, consider incorporating movement elsewhere in the frame. Wind-blown leaves, swaying branches, or swirling mist can be artfully blurred with slightly longer exposures, adding dynamic elements that complement the waterfall’s motion while keeping stationary features sharp. The ultimate goal is to use shutter speed, composition, and light to tell a unique story about each waterfall, rather than conforming to a single, prescribed look.
XII. Capturing Intimate Details and Smaller Cascades
After securing wider shots that establish the overall scene, turn attention to the smaller, often overlooked details. A waterfall’s environment is rich with micro-compositions: intricate patterns formed by water flowing over rocks, vibrant moss-covered surfaces, leaves caught in eddies, or tiny subsidiary cascades. These intimate details can create compelling images that offer a different perspective and add depth to a photographic series.
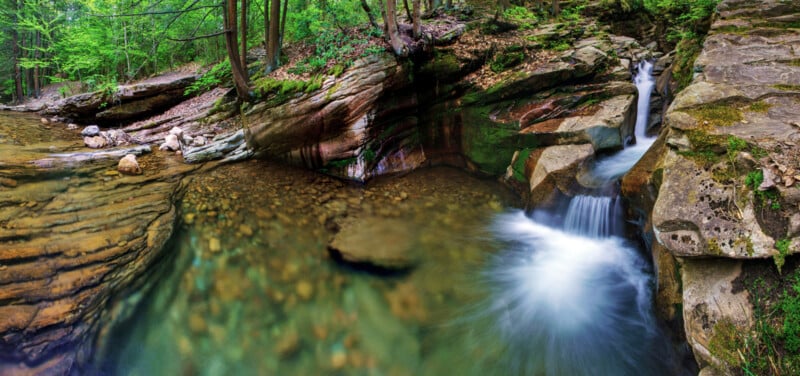
A telephoto lens excels in isolating these smaller elements, allowing for precise framing and the exclusion of distracting background clutter. However, even with a standard lens, moving closer (safely) or considering post-processing crops can achieve similar results. These detailed shots not only offer a unique artistic outlet but also contribute to a more comprehensive visual narrative of the location, showcasing both its grandeur and its subtle intricacies.
XIII. The Patience of a Photographer: Observing and Adapting
One of the most significant advantages of waterfall photography is the stationary nature of the subject. Unlike wildlife or fleeting natural phenomena, the waterfall remains, offering ample time for deliberate exploration and experimentation. After capturing the initial, obvious compositions, resist the urge to pack up. Instead, linger. Observe how the light shifts, how the water’s flow changes, and how atmospheric conditions evolve.
Try a new angle, switch from horizontal to vertical, or seek out a detail that was initially missed. The photograph envisioned before arriving may not be the most compelling one available. Often, a minor adjustment in perspective, a subtle change in shutter speed, or a re-evaluation of foreground elements can dramatically transform an image. This process of observation, adaptation, and iterative experimentation is fundamental to photographic growth.
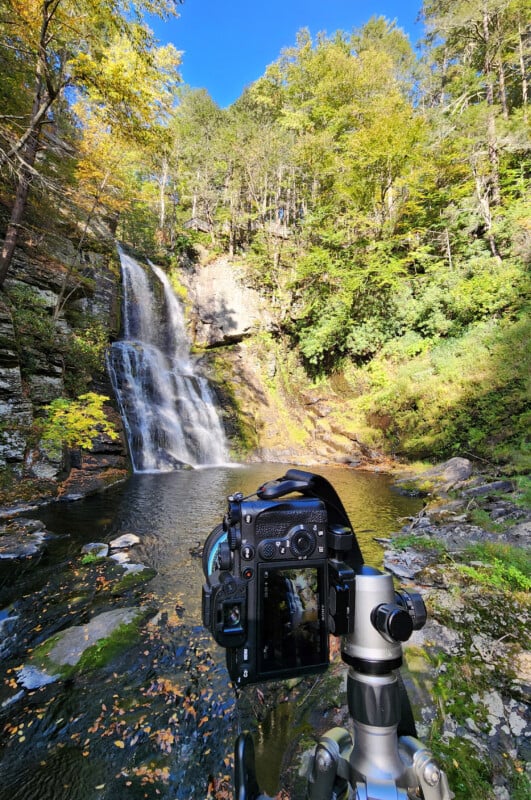
Ultimately, waterfall photography transcends the mere technical execution of making water appear silky. It is a profound exercise in understanding the interplay of light, movement, perspective, and composition to evoke a feeling, a mood, or a unique characteristic of a place. The more time and thoughtful consideration invested in observing and interacting with the environment, the greater the likelihood of returning with images that truly capture the soul of the waterfall, rather than simply documenting its existence. This patient, mindful approach is the hallmark of a true landscape photographer.