The rapid democratization of video production, fueled by advancements in camera technology and the pervasive influence of digital platforms, has ushered in an era where individuals and nascent professionals alike are increasingly engaging with videography. While this accessibility is empowering, it also presents a steep learning curve, often leading to common technical pitfalls that can significantly compromise the quality of visual content. Following a previous examination of foundational photography mistakes, this analysis delves into prevalent videography issues, offering comprehensive, fact-based solutions crucial for elevating production standards. Understanding these challenges—from visual instability to compromised audio and technical misconfigurations—is paramount for anyone aspiring to produce compelling and professional-grade video.
The Pervasive Challenge of Visual Instability: Tackling Shaky Footage
One of the most immediate and discernible indicators of amateur videography is the presence of shaky footage. The human body, inherently dynamic, struggles to maintain the absolute stillness required for cinematic stability, even with conscious effort. While the human eye might perceive a steady hand, the subtle tremors are amplified by camera sensors, particularly in higher resolutions or with longer focal lengths. This instability not only detracts from the professional aesthetic but can also induce motion sickness in viewers, creating a disengaging and unpleasant experience.
The evolution of camera technology has introduced built-in optical (OIS) and electronic image stabilization (EIS) systems, which offer a degree of mitigation by counteracting minor jitters. However, for truly smooth and controlled camera movements—essential for dynamic storytelling, tracking shots, or even simple pans and tilts—dedicated stabilization equipment is indispensable. Industry experts consistently emphasize that relying solely on in-camera stabilization often falls short of professional expectations, particularly as production demands increase.
Technical Solutions and Supporting Data:
The market for video stabilization systems has diversified significantly, catering to a spectrum of budgets and equipment types. For smartphone videographers, devices such as the DJI Mobile series (e.g., DJI Mobile 7P) represent an accessible entry point. These compact, motorized gimbals utilize a combination of brushless motors and sophisticated algorithms to counteract unwanted motion across three axes (pan, tilt, and roll). They excel at smoothing out walking shots, creating fluid transitions, and enabling advanced features like active tracking, transforming handheld phone footage from erratic to remarkably cinematic. The cost-effectiveness and portability of these units have made them a cornerstone for mobile content creators.
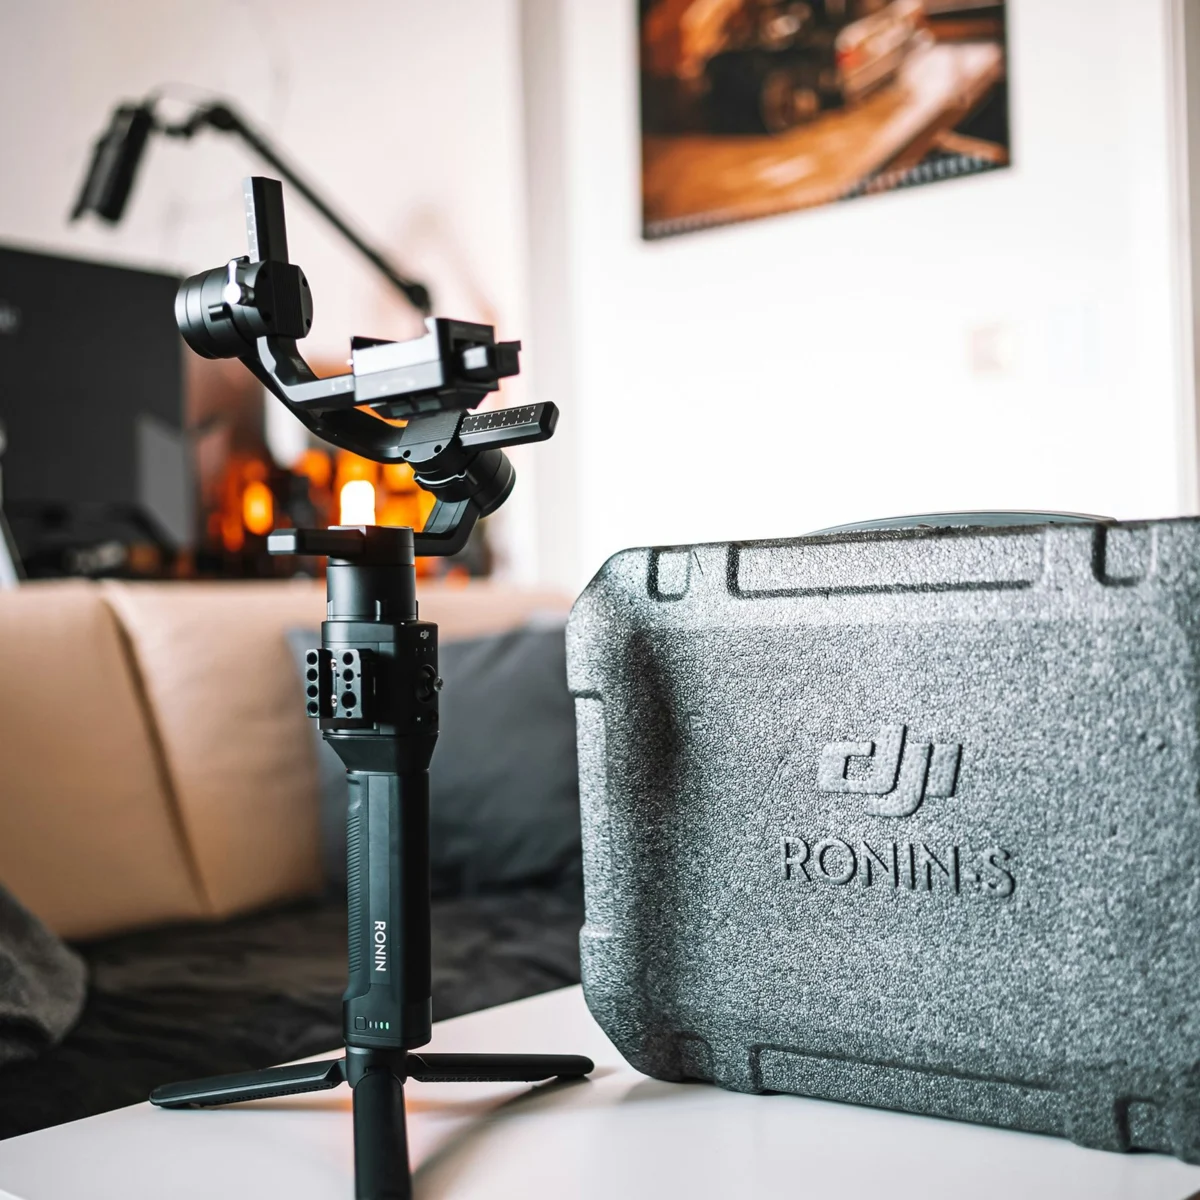
Stepping up to mirrorless and smaller DSLR camera systems, gimbals like the DJI Ronin-SC offer robust three-axis stabilization for payloads typically up to 4.5 pounds. These systems provide greater precision and motor torque, accommodating a wider range of lenses and accessories. Their ergonomic design facilitates single-handed operation, enabling dynamic low-angle shots and intricate camera paths that would be impossible with unassisted handheld shooting. For camera setups exceeding this weight, such as professional DSLRs, cinema cameras, or heavier mirrorless configurations, the DJI Ronin-S (or its successors) becomes the recommended choice, supporting payloads often surpassing 8 pounds. These larger gimbals offer enhanced stability, more robust construction, and advanced control features, allowing cinematographers to execute complex movements with precision.
Beyond motorized gimbals, other stabilization tools serve specific production needs. For stationary or deliberate movements, a high-quality tripod paired with a fluid-head system is foundational. Fluid heads, designed with internal dampening mechanisms, allow for smooth, controlled pan and tilt movements, critical for interviews, landscape shots, or any static scene requiring precise framing adjustments. Furthermore, for demanding long-duration shoots with heavier camera rigs, systems like the Easyrig Vario 5 offer crucial ergonomic support. These body-worn support systems redistribute the camera’s weight from the operator’s arms and shoulders to their hips, back, and legs. This significantly reduces fatigue, allowing for extended shooting periods and enabling steadier handheld operation over time, particularly beneficial for documentary filmmaking or event coverage where mobility and endurance are key. The adoption of such diverse stabilization tools reflects a chronological progression in videography, where the pursuit of visual fluidity has led to increasingly specialized and effective solutions, becoming standard practice across various production tiers.
The implications of neglecting proper stabilization are profound. Visually jarring footage diminishes viewer retention, undermines the perceived professionalism of the content, and can even compromise the narrative integrity of a video. Investing in appropriate stabilization tools, matched to the specific camera system and production requirements, is not merely an enhancement but a fundamental requirement for producing high-quality video content that resonates with audiences.
The Unseen Imperative: Mastering Audio Quality
While visual fidelity often receives primary attention in videography, the importance of pristine audio cannot be overstated. A common and critical mistake made by new videographers is underestimating the impact of poor sound, often realizing its detrimental effects only during the post-production phase. Bad audio—characterized by excessive background noise, muffled dialogue, inconsistent levels, or distortion—can irrevocably ruin even the most visually stunning footage, rendering the content unwatchable or incomprehensible. Industry professionals widely concur that audiences are often more forgiving of less-than-perfect visuals than they are of poor audio.
The primary culprit behind subpar audio is frequently the reliance on built-in microphones found on most video cameras. These integrated microphones are typically omnidirectional, capturing sound from all directions indiscriminately. While convenient, this design means they pick up not only the intended subject’s voice but also ambient noise, camera handling sounds, and environmental distractions, resulting in a noisy and unprofessional soundscape. The limited dynamic range and frequency response of these internal mics further compound the problem, leading to thin, tinny, or distorted recordings.
Technical Solutions and Supporting Data:
The solution to inadequate audio lies in external, dedicated audio recording equipment. For capturing clear dialogue, particularly in interview settings or for presenters, lavalier microphone systems are paramount. These small, discreet microphones clip onto clothing, positioning them close to the speaker’s mouth, thereby minimizing room echo and extraneous noise while maximizing speech clarity. Wireless lavalier systems, such as the Sennheiser G4 or DJI Mic 2, offer unparalleled freedom of movement for subjects, making them ideal for dynamic interviews, presentations, or documentary work. These systems typically transmit audio wirelessly to a receiver connected to the camera or a dedicated audio recorder, ensuring flexibility without compromising quality. The DJI Mic 2, for instance, boasts internal recording capabilities as a backup, a feature increasingly sought after for production reliability.
For capturing the broader soundscape of a scene, ambient audio, or dialogue from a distance, shotgun microphones are the preferred choice. These highly directional microphones are designed to pick up sound predominantly from the direction they are pointed, effectively rejecting off-axis noise. Models like the RODE VideoMic Pro Plus are popular on-camera shotgun microphones, offering a significant upgrade over built-in mics for run-and-gun situations. For more professional setups, longer shotgun microphones mounted on boom poles, positioned just out of frame, are used to capture dialogue with superior isolation and clarity, often operated by a dedicated sound mixer.
Crucially, for optimal control and quality, dedicated external audio recorders are indispensable. Devices such as the Zoom H6 or Zoom H4n Pro offer multiple input channels, professional-grade preamps, and the ability to record high-resolution audio files (e.g., WAV at 24-bit/48kHz or higher). Recording audio externally allows for greater flexibility in setting gain levels, monitoring input, and isolating channels, which is invaluable during post-production. The Zoom H6, for example, features interchangeable microphone capsules, making it highly adaptable to various recording scenarios, from capturing ambient sounds to multi-person interviews.
A final, yet critical, component of effective audio management is real-time monitoring. A quality pair of studio headphones connected to the camera or audio recorder allows the videographer or sound engineer to listen to the audio as it’s being captured, identifying and rectifying issues like clipping, hums, or interference before they become irreversible. This proactive approach prevents the costly and time-consuming necessity of re-shooting or attempting to salvage compromised audio in post-production. The chronological integration of these tools—from basic lavaliers to complex multi-channel recorders and monitoring—reflects a maturing understanding in the industry of audio’s foundational role in video storytelling.
The implications of neglecting audio are severe. Viewers will quickly disengage from content with poor sound, regardless of visual quality. This can lead to a loss of audience, damage to professional reputation, and, in commercial contexts, a failure to effectively convey messages or achieve marketing objectives. Prioritizing external audio solutions and diligent monitoring is not an optional luxury but a fundamental requirement for producing impactful video.

Navigating the Post-Production Frontier: Understanding Log Footage
A perplexing issue for many videographers, particularly those transitioning from still photography or basic video recording, is footage that appears "grayed out," lacking in contrast and saturation directly out of the camera. This phenomenon is often misinterpreted as a camera malfunction or incorrect settings, when in fact, it is a deliberate and powerful feature: shooting in a "log" format.
Logarithmic gamma curves (commonly referred to as "log profiles" or simply "log") are a sophisticated method of recording video data, adopted by virtually all professional camera manufacturers (e.g., Sony S-Log, Canon C-Log, Panasonic V-Log, Nikon N-Log, ARRI Log C). The core principle behind log recording is to capture the maximum possible dynamic range from the camera’s sensor. Unlike standard video formats (like Rec. 709) which compress dynamic range to fit consumer display standards, log profiles record a wider range of light and shadow information. This is achieved by compressing the luminance (brightness) values in a logarithmic curve, which effectively flattens the image and reduces saturation, giving it that characteristic "grayed out" appearance.
Technical Explanation and Supporting Data:
The primary advantage of shooting in log is the vastly increased flexibility it provides during the color grading process in post-production. By preserving more detail in both the highlights and shadows, log footage offers a much larger "canvas" for colorists to work with. They can push and pull colors, adjust contrast, and fine-tune exposure without introducing banding, crushing shadows, or blowing out highlights—issues commonly encountered with standard Rec. 709 footage. This expanded dynamic range is particularly beneficial in high-contrast lighting situations, such as outdoor shoots with bright skies and deep shadows, where standard profiles might struggle to retain detail in both extremes.
The perceived lack of saturation and contrast in log footage is not a flaw but a feature. Color information can be easily and precisely added back, along with contrast adjustments, using Look Up Tables (LUTs) or manual color grading tools in software like DaVinci Resolve, Adobe Premiere Pro, or Final Cut Pro. A basic "conversion LUT" can instantly transform log footage into a vibrant Rec. 709 image, often serving as a starting point for further creative grading. This process involves mapping the wide dynamic range of the log footage to the narrower range of a standard display, while simultaneously restoring natural colors and contrast.
However, shooting in log is not always necessary or even advisable for every production. For simple projects, quick turnaround content, or situations where post-production time and expertise are limited, shooting in a standard Rec. 709 profile might be more efficient. Overkill for some, log recording demands a dedicated post-production workflow and understanding. If one mistakenly shoots in log without intending to color grade, the "grayed out" footage can still be easily salvaged by applying a conversion LUT to Rec. 709, thereby restoring standard colors and contrast. This illustrates a key aspect of modern digital cinematography: the deliberate separation of image capture from final image rendition, granting filmmakers unprecedented creative control. The chronological adoption of log profiles, initially a high-end cinema feature, now trickling down to prosumer mirrorless cameras, underscores its value in advanced image manipulation.
The implications of understanding log footage are significant for both creative freedom and workflow efficiency. Misunderstanding log can lead to frustration and wasted effort if footage is deemed "unusable." Conversely, mastering log recording and grading unlocks a powerful toolkit for achieving sophisticated cinematic looks, matching footage from different cameras, and ensuring consistency across a project. It empowers videographers to take full control of their image, moving beyond the limitations of in-camera processing to craft a truly unique visual signature.
Ensuring Smooth Visuals: Addressing Choppy Video Footage
The experience of watching video that appears jerky, stuttering, or "choppy" is highly disruptive and instantly detracts from the viewing experience. This common issue in nascent videography typically stems from one of two fundamental technical misconfigurations, both of which are readily identifiable and correctable. Understanding the interplay between frame rate and data transfer speed is crucial for achieving the smooth, fluid motion expected in modern video content.
Technical Solutions and Supporting Data:
The first, and often most obvious, cause of choppy footage relates to the frame rate (FPS) at which the video is recorded. Frame rate refers to the number of individual still images (frames) displayed per second, creating the illusion of motion. A lower frame rate means fewer images per second, resulting in less fluid motion, especially noticeable during movement within the frame or camera pans.
Industry standards for video frame rates are well-established. For a natural, cinematic look, 24 frames per second (24 FPS) is a common choice, mimicking traditional film. However, for general video content, broadcast, and smoother motion, a frame rate of 30 FPS (or 29.97 FPS for NTSC-based systems) is widely recommended and serves as a default for many cameras and platforms. This rate provides a good balance between motion fluidity and file size. For capturing fast-moving action, sports, or for the intention of creating slow-motion effects in post-production, higher frame rates such as 60 FPS (or 59.94 FPS) are essential. Shooting at 60 FPS provides twice as much temporal information as 30 FPS, allowing for incredibly smooth playback at normal speed and the ability to slow down footage by 50% without introducing choppiness. Many modern cameras default to a suitable frame rate, but it is imperative for videographers to consistently verify this setting before recording, especially when switching between different shooting modes or presets. A chronological understanding of frame rates reveals how technological advancements have moved from lower, film-based rates to higher, digitally-enhanced options for versatility.
The second critical factor contributing to choppy footage is the write speed of the recording media. Video, especially at higher resolutions (e.g., 4K, 8K) and higher bitrates (the amount of data recorded per second), generates a substantial volume of data very rapidly. If the memory card (SD card, CFast, SSD) or internal storage device cannot write this data quickly enough, the camera’s buffer will fill, causing dropped frames or interruptions in recording, which manifest as choppy footage.
Memory cards and storage devices are rated by their transfer speeds, typically listed in megabytes per second (MB/sec). These ratings are often prominently displayed on the card’s packaging or directly on the card itself, sometimes using speed classes (e.g., Class 10, UHS Speed Class 3/U3, Video Speed Class V30, V60, V90). For instance, a V90 card guarantees a minimum sustained write speed of 90 MB/sec, which is crucial for recording high-bitrate 4K or 8K video. It is essential to match the memory card’s write speed capabilities with the camera’s recording requirements. Camera manufacturers typically specify the minimum recommended card speed for different recording formats. There is no disadvantage to purchasing the fastest memory or hard drive available; indeed, it future-proofs the investment, increasing its use case as one scales up to faster and higher-resolution shooting settings. Faster media also significantly reduces offload times during post-production, streamlining the overall workflow.
The implications of neglecting frame rate or media speed are direct and detrimental to the viewer’s experience. Choppy footage is distracting, unprofessional, and undermines the effort invested in composition, lighting, and performance. Ensuring correct frame rate settings and utilizing sufficiently fast recording media are non-negotiable technical requirements for producing smooth, high-quality video, directly impacting audience engagement and the perceived professionalism of the content.
A Holistic Approach to Videography Excellence: Beyond the Basics
The journey into videography, while incredibly rewarding, is an iterative process of learning, experimentation, and refinement. The common pitfalls of shaky footage, poor audio, misunderstanding log profiles, and choppy playback represent foundational challenges that, when addressed effectively, elevate video production from amateur attempts to compelling visual narratives. Each solution discussed—from investing in robust stabilization systems and dedicated audio equipment to mastering frame rates and utilizing high-speed media—is a critical building block in a comprehensive production workflow.
The landscape of video technology continues to evolve at a rapid pace, with increasingly sophisticated tools becoming more accessible to creators at all levels. However, the underlying principles of good videography remain constant: stability, clear audio, and a clear understanding of image capture and post-production. Industry experts consistently advise that technical proficiency in these areas forms the bedrock upon which creative vision can truly flourish. Neglecting any of these elements can severely compromise the effectiveness and impact of a video, regardless of its artistic merit.
For aspiring videographers, the initial investment in understanding and mitigating these common issues is not merely about acquiring gear, but about developing a discerning eye and ear, coupled with a systematic approach to pre-production, shooting, and post-production. This continuous pursuit of technical excellence, paired with an unwavering commitment to storytelling, is what ultimately distinguishes memorable video content in an increasingly saturated digital world. As technology continues to democratize high-quality video production, the onus remains on the creator to master these fundamental challenges, ensuring that their visual stories are not only seen but also heard and felt with clarity and impact.